One craft, one project a week, from a manual old enough to belong to everyone. This season’s craft is rope work, from A. Hyatt Verrill’s Knots, Splices and Rope Work (1912). The pictures are the book’s own plates; the steps are ours. You need a metre of rope or thick cord.
This week’s project
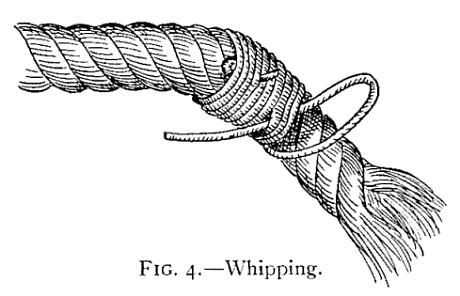
Whip a rope’s end
A rope end left loose frays. Whipping it with twine is the first thing a rope worker learns, and every other project goes better with tidy ends.
Lay a length of twine along the rope with a loop pointing towards the end.
Wind the twine tightly round the rope and the loop, working towards the end.
Pass the end of the twine through the loop and pull the other end until the loop disappears under the turns.
Trim both ends of the twine close.
Fig. 4, Whipping
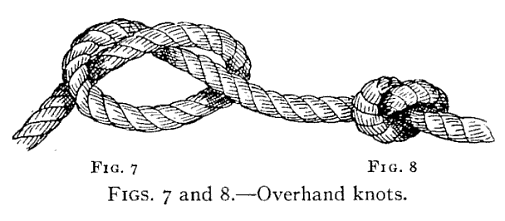
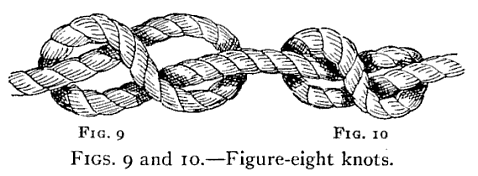
Overhand and figure-eight
The two simplest stopper knots: a knot that stops a rope slipping through a hole. The figure-eight is bulkier and easier to untie.
Overhand: make a loop and pass the end through it.
Figure-eight: make a loop, take the end round behind the standing part, and come back down through the loop.
Pull both tight and compare their size.
Figs. 7 and 8, Overhand knotsFigs. 9 and 10, Figure-eight knots
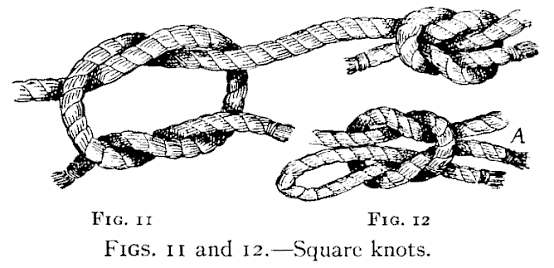
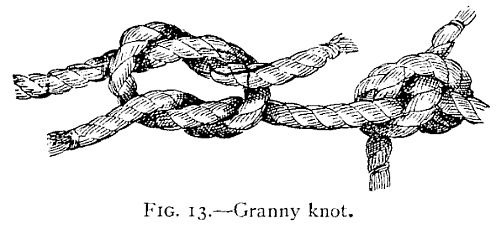
The square knot, and the granny
The square (reef) knot ties two ends together flat. Its wrong twin, the granny, slips. Learning to tell them apart is the lesson.
Right end over left and under; then left end over right and under.
Check: each end lies alongside its own standing part. If not, you have a granny.
Tie a granny on purpose and feel how it twists.
Figs. 11 and 12, Square knotsFig. 13, Granny knot
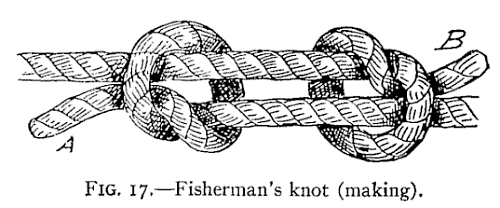
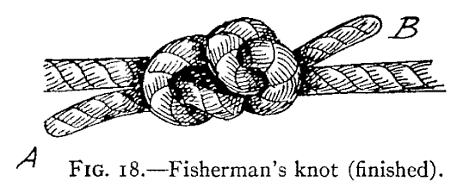
The fisherman’s knot
Two overhand knots, each tied round the other line, join two thin lines. Pulled apart, they slide together and hold.
Lay the two lines side by side, ends pointing opposite ways.
Tie an overhand knot with one end round the other line.
Do the same with the other end.
Pull the standing parts apart so the two knots meet.
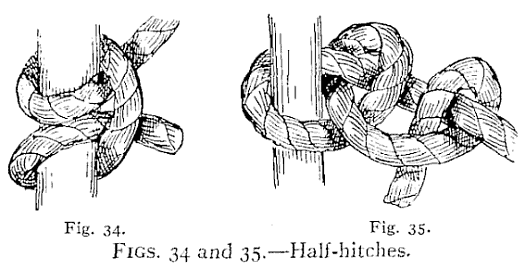
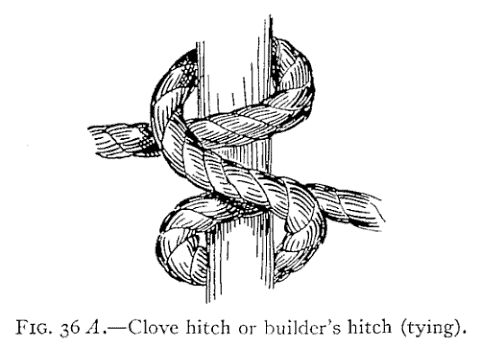
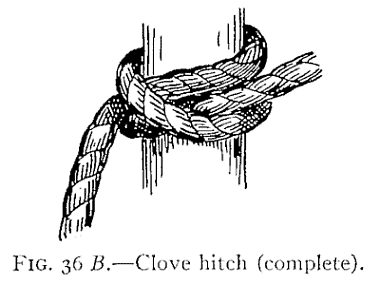
A hitch ties a rope to something else: a post, a ring, a rail. These two are the everyday ones.
Two half-hitches: round the post, then round the standing part twice, the same way each time.
Clove hitch: round the post, cross over, round again, and tuck under the crossing.
Pull on the standing part and watch which grips harder.
Figs. 34 and 35, Half-hitchesFig. 36 A, Clove hitch (tying)Fig. 36 B, Clove hitch (complete)
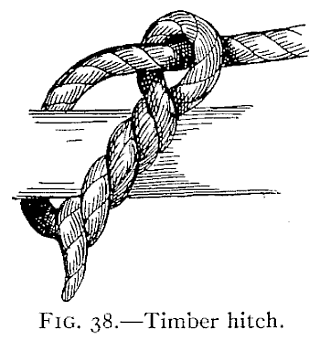
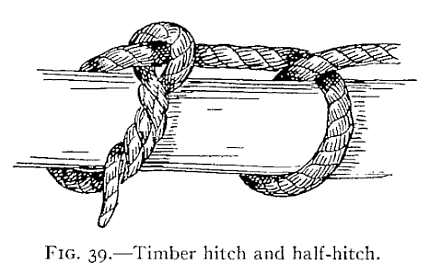
The timber hitch
For dragging a log or lifting a plank: it grips harder the more you pull, and falls apart when you stop.
Pass the end round the timber.
Take it round its own standing part.
Twist the end back round itself three times.
For more grip, add a half-hitch further along.
Fig. 38, Timber hitchFig. 39, Timber hitch and half-hitch
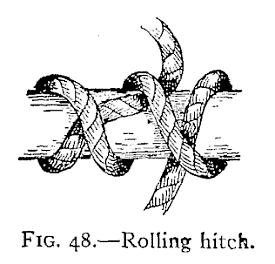
The rolling hitch
A hitch that will not slide along a rope or rail when you pull sideways. Sailors use it to take the strain off another line.
Two turns round the rail, each crossing the standing part.
One more turn on the far side.
Tuck the end under that last turn and pull sideways to test it.
Fig. 48, Rolling hitch
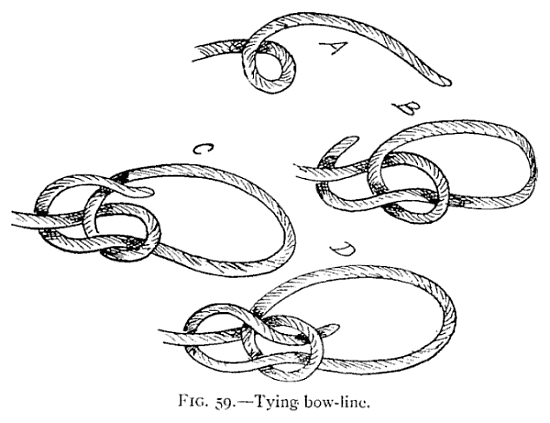
The bowline
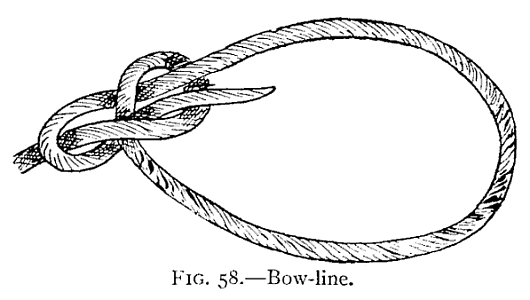
A fixed loop that never slips and always unties, even after a hard pull. Verrill calls it the sailor’s knot above all others.
Make a small loop in the standing part.
Bring the end up through the loop from below.
Pass it round behind the standing part.
Back down through the small loop, and pull tight.
Fig. 59, Tying bow-lineFig. 58, Bow-line
The sheepshank
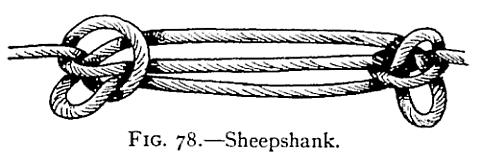
Shortens a rope without cutting it. Shows that a knot can be a tool for length as well as for joining.
Fold the rope into an S, with three parts side by side.
Make a half-hitch near each end and slip it over the folded bight.
Keep it under strain, or it can shake loose.
Fig. 78, Sheepshank
The eye splice
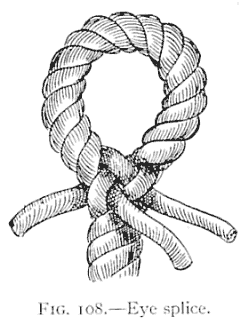
A loop woven into the rope itself, stronger than any knot. The first real splice.
Unlay the end into its three strands for a short way.
Bend it back to make the eye, and tuck the middle strand under one strand of the rope.
Tuck the other two strands, each under the next strand along.
Repeat the tucks two or three times and trim.
Fig. 108, Eye splice
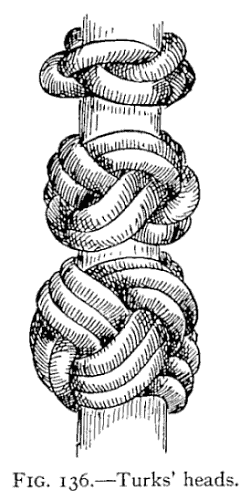
The Turk’s head
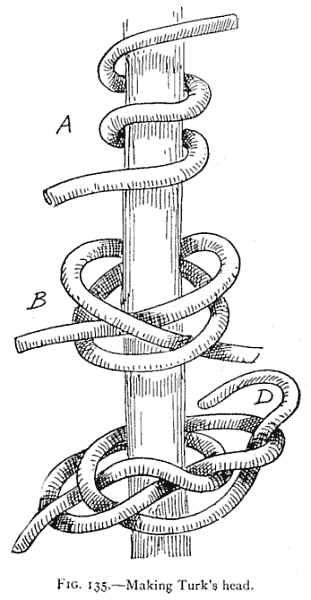
A decorative knot woven round a rail or a bracelet. It looks hard and is only patience.
Take two turns round your wrist or a rolling pin.
Weave the end over and under, following the pattern on the plate.
Go round again following the first pass, two or three times.
Work it tight bit by bit and tuck the ends inside.
Fig. 135, Making Turk’s headFig. 136, Turks’ heads
All twelve projects
The week’s project changes every Monday, the same for everyone. You can open any of them now.
“I tied it” is kept only on this device. There are no badges and nothing to lose.
Plates from A. Hyatt Verrill, Knots, Splices and Rope Work (1912), in the public domain in the United States; scans from Project Gutenberg. Children can try the same knots with a grown-up; nothing here is a safety rating for climbing or boating.